10:01pm:
Well. I finally figured out that I've been doing this whole thing 1/2 baked.
Or in this case, 1/2 annealed.
I'd like to preface this that I have no experience with heating up metal. So when I read that you needed to get it hot, I figured it was hot enough when I got the nice pretty red colors on copper. When I read about Lawton-Brain suggesting that you should 'open' the copper shapes with quickly with your hands, I just thought, 'Wow, he has strong hands!' The copper still moved, just not as much as pictures I've seen. But I'm just beginning, so I thought it was hammer facility~
 |
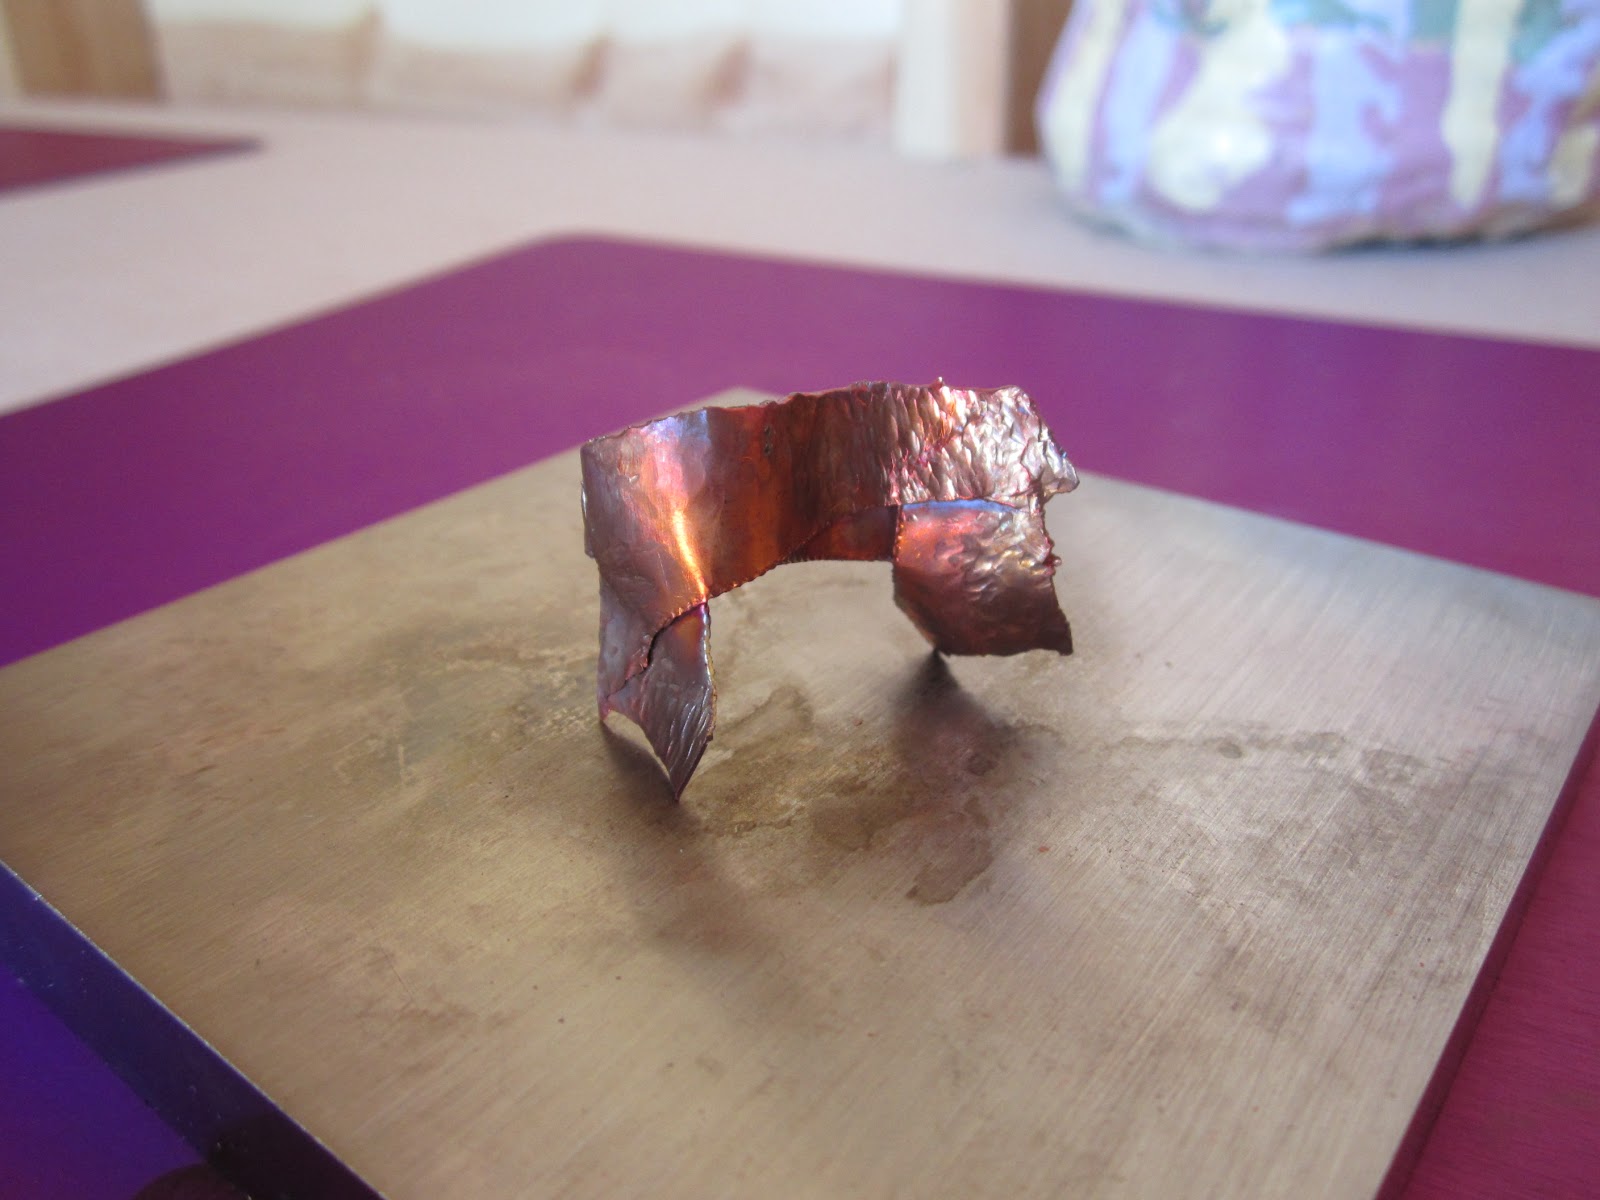
| before |
I started with the basic shape, my objective was trying to get it to ruffle. Pretty ruffles that I've seen googling 'anticlastic.' I read somewhere that you hammer the unfolded side. I did that yesterday. It was different than hammering the folded side, but no ruffles. Then I thought, well, maybe I need to hammer one time on the unfolded side, creating hammer marks that would work like dams, and then continue to hammer the folded side. NO ruffles.
Then, in my slow logic, I remembered my class from last Wednesday, and the teacher was showing us with silver, how it needed to glow a deep red, almost molten! for it to be annealed. And then I remembered the night before when I soldered the thin 30g copper bezel, and how it turned slightly molten looking and ended up a dark grey blue, and after I quenched it, it was like butter!
So I heated it up. Until it was past the pretty colors. Past the light torch trails tracking on the metal. Until it was a dark blue steel color. Then I quenched it.
WOW. It was
soft. I felt like Superman manipulating it!
 |
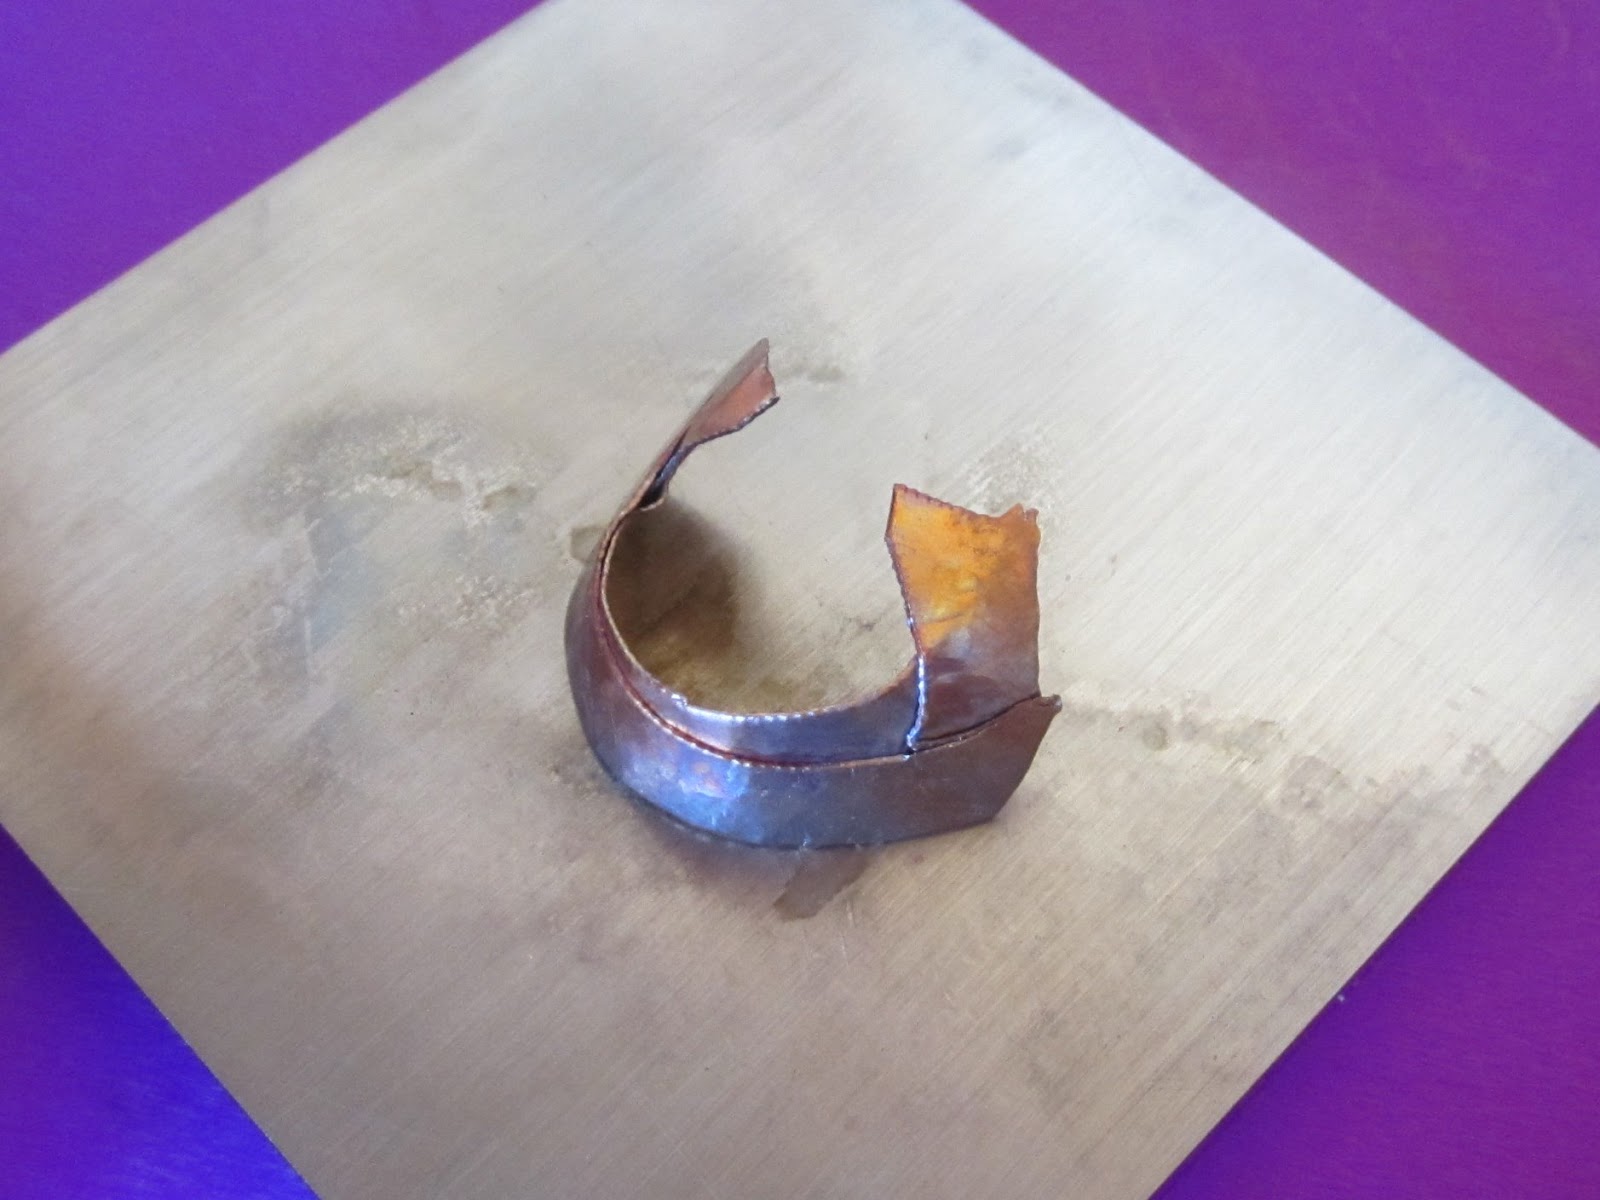
| After |
Of course, I will have to polish it and color it, since it will have to be pickled to get rid of the residue, but this opens up things for me! (see what I did there?)